Introduction
A capacitor plays a key role in electronic components, helping to store and manage voltage within a circuit. Whether dealing with electrolytic or non-electrolytic types, knowing how to test a capacitor is important to ensure they function properly. Over time, these parts may weaken, affecting device performance. Regular testing helps maintain efficiency and regulate current flow, especially in transistor-based power supplies. By following the right steps, you can diagnose issues and keep your electronics in top shape.
Traditional Basic Capacitor Testing Method
Disconnect the capacitor from the circuit to prevent interference in the readings. This step ensures accurate results.
Check the exterior of the capacitor for any visible damage and note its capacitance value written on the body.
Select the correct capacitance setting on the multimeter before proceeding with the test.
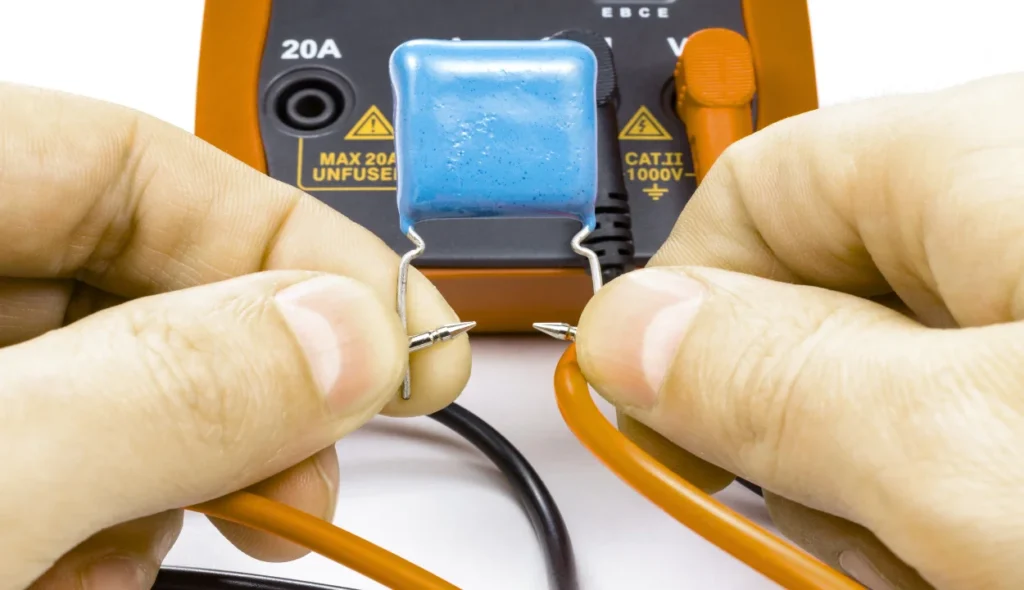
Attach the multimeter probes to the capacitor terminals and note the measurements.
Compare the multimeter reading with the specified value to determine if the capacitor is functioning properly.
Different methods to check a capacitor
A bad capacitor may cause a slow start in a motor or show obvious signs like bulging or leakage. If it appears faulty, it should be replaced, as these are definite warnings to test and reveal potential issues.
How to Test a Capacitor with a Multimeter
Method 1: Using the Capacitance Mode on a Multimeter
To check if a capacitor is faulty, you can use multimeters with a built-in capacitance mode. This method helps compare the actual value with the one on the case and detect high or low fluctuations. If the reading is beyond the acceptable tolerance band, the capacitor should be replaced.
Remove the capacitor from the board and discharge it using a resistor.
Rotate the selection knob of the multimeter to capacitance mode.
Connect the probe leads to the terminals (positive to red, negative to black).
Observe the display and compare the value with the printed number on the case.
Some fluctuating readings within the tolerance band are normal, but extremely high or low readings mean that they are faulty.
Method 2: Using the Resistance (Ω) Mode on the Multimeter
To test a capacitor using the resistance (Ω) mode, you will need to remove the capacitor from the circuit and set the multimeter to the OHM range. When you connect the leads to the positive and negative terminals of the capacitor, the needle of an analog multimeter should increase as the capacitor charges. In a digital multimeter, the display will show the value rising and eventually settle at infinity, indicating the capacitor works fine. If the needle stays at a low value, it may have a short, and if it stays at a high value, the capacitor is likely open and should be replaced.
Remove the capacitor from the circuit.
Set the multimeter to resistance (Ω) mode.
Attach the probes to the positive and negative terminals.
The needle should increase in value as the capacitor charges.
The display will show values rising toward infinity if the capacitor is good.
If the value remains constant at low or high, the capacitor may be faulty and needs to be replaced.

Method 3: Test a Capacitor Using a Simple Voltmeter
Testing a capacitor with a voltmeter is an easy and quick method. Here’s how you can go about it:
Connect the leads of your voltmeter to the capacitor’s terminals: Attach the red probe to the positive terminal and the black probe to the negative terminal of the capacitor.
Set the voltmeter to DC voltage mode: Make sure to adjust the knob to a setting that will measure the appropriate voltage range for the capacitor. Typically, you’ll use the DC setting, as the capacitor stores a DC voltage.
Discharge the capacitor: Before measuring, discharge the capacitor by shorting the two terminals together with a resistor to avoid a faulty reading. A fast discharge will help you get a more accurate measurement.
Observe the reading: When you connect the probes, watch for the voltage displayed. If the capacitor is functioning correctly, it will show a gradual voltage shift that corresponds with the charge being stored. If the voltage reading stays too low or doesn’t change, there might be a fault.
Check against the maximum permissible value: The reading should match the capacitor’s value and not exceed the maximum voltage rating. For example, if your capacitor is rated for 25 volts, anything above that may indicate an issue.
Method 4: Checking the Capacitor Using the Continuity Mode of a Multimeter
Testing a capacitor with a multimeter using the continuity mode is a straightforward yet effective way to check if the capacitor is in good condition. Here’s how you can do it:
Remove the capacitor from the board to ensure accuracy in testing. You don’t want any external connections affecting the results.
Select the continuity mode on your multimeter. This is usually marked with a symbol that looks like a wave or a sound wave.
Attach the black probe to the capacitor’s negative terminal and the red probe to its positive terminal.
When you connect the probes, the multimeter should beep or show a low resistance reading if the capacitor is good. This indicates that the circuit is complete and the capacitor is not shorted.
As you keep the probes connected, the beep will stop, or the reading will change gradually if the capacitor is functional. A good capacitor will show a gradual change in resistance.
If the multimeter beeps continuously without stopping, it suggests a SHORT in the capacitor, meaning it is faulty.
Twist the capacitor to check its condition from different angles. If there is no change in the reading, the capacitor may be damaged.
Method 5: Check the Capacitor Using the Time Constant
To test a capacitor’s performance, you can apply the time constant formula, τ=RC, where R is the resistance in the circuit and C is the capacitance of the capacitor. Using a stopwatch or timer, you can monitor how quickly the voltage across the capacitor reaches 63.2% of the applied voltage. The time it takes for this to happen gives you the time constant, which should match the calculated value based on the resistance and capacitance. If this value is too high or low, the capacitor may be faulty and needs to be replaced.
First, set up the circuit with a known resistance and capacitor.
Apply a 10 V voltage to the circuit.
Start the stopwatch as soon as the voltage is applied.
Observe the voltage on the display panel or multimeter.
When the voltage reaches 6.32 V, stop the timer.
The time measured is the time constant.
Compare this value to the calculated time constant using the formula τ = RC.
If the measured time is too long or short, the capacitor may be in a faulty condition.
You can repeat the steps to ensure accuracy and consistency.
If needed, remove the capacitor and try with another one to confirm the results.
Method 6: Inspecting the capacitor visually for faults
When testing a capacitor, one of the first things to check is whether it shows any apparent signs of failure. Look for bulging or cracks on the top or bottom of the case. These damaged areas often indicate internal pressure or a gas release, which can be a sure sign of a faulty capacitor.
Take a close look at the rubber vent, as it may have been pushed out or lifted due to internal issues. Damaged terminals or broken connections can also determine if the capacitor is weak or is eventually causing the failure of surrounding components. SMD (Surface-Mount Device) capacitors are especially susceptible to these problems due to their smaller size.
In ceramic and electrolytic capacitors, burnt spots or broken areas are common signs of failure. Look for cracks or any signs of discharge that could indicate the capacitor is no longer working properly. Visually inspecting the capacitor allows you to quickly determine if it is connected correctly and avoids missing any early failure signs.
How to Check a Capacitor with an Ohm Meter
When testing a capacitor with an ohm meter, you should be careful. First, unplug the appliance and ensure the capacitor is discharging to avoid any shock or electric hazard. Use the probes of your meter to connect to the terminals of the capacitor. Initially, the meter should show zero or near-zero resistance. Then, it should gradually increase as the capacitor stores energy. If the reading stays at zero, the capacitor might be shorted or damaged. The highest ohm level you see during testing indicates the capacitor is functioning ideally. Always disconnect the tool immediately after testing.
How to Measure a Capacitor with a Voltmeter
To test a capacitor with a voltmeter, first ensure the capacitor is charged. Connect the voltmeter to the terminals and check the voltage it displays. A working capacitor should show a charge similar to the voltage rating of the capacitor if it is functioning properly.
Conclusion
Testing a capacitor is essential to ensure it functions properly in any electrical circuit. Using methods like the voltmeter, multimeter, or ohmmeter, you can effectively determine whether a capacitor is faulty or in good condition. Checking voltage, measuring the time constant, and examining continuity all give useful insights into how the capacitor performs. Always remember to follow proper safety precautions, such as unplugging the appliance and discharging the capacitor to avoid electric shock. Regular testing helps maintain the efficiency of electrical devices and prevents damage from faulty capacitors.